Neuralblender Settings explained
This article will show you how the NeuralBlender settings work.
If you are new to NeuralBlender I would suggest to just enter a text in the text input field - for example: “a verry happy cat” - and press “go!”. No need to change any settings. You can learn about it later step by step once you got the basics.
Screenshot of the main NeuralBlender settings:
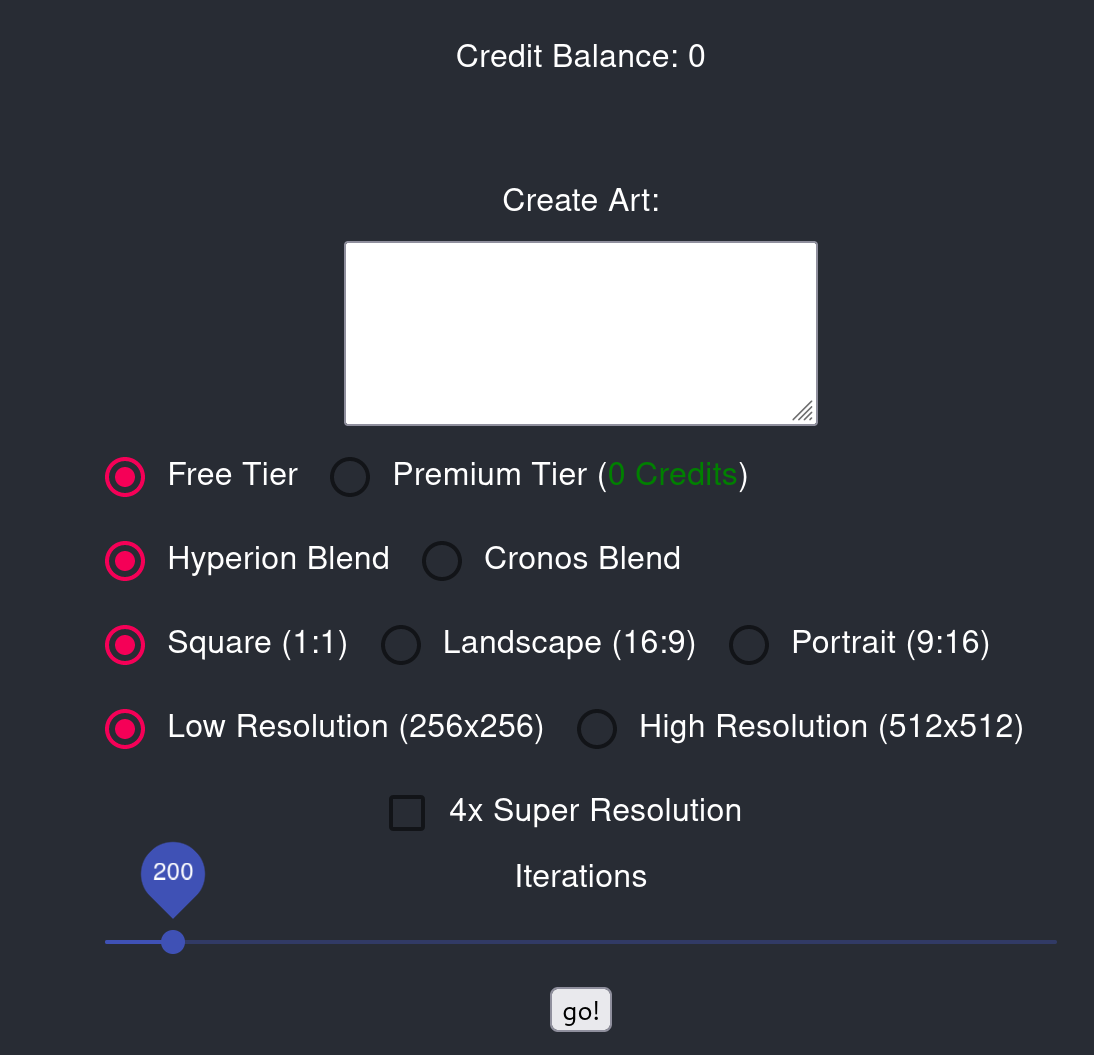
NeuralBlender has a free tier that allows anyone to create images for free. Depending on the settings you select, credits might be required and will automatically select the “premium tier”.
Different “Blends”
Selecting a “blend” allows you to select a different kind of AI model that NeuralBlender uses. Each model has it’s own unique character.
Hyperion Blend
Hyperion Blend is the deault settings and brings you predictible good results.
Cronos Blend
Cronos Blend is a new model that can be a bit of a hit-and-miss. Good results can be amazing but sometimes it also produces results that seem not too much related to the input. Other than the default Hyperion Blend, the Cronos Blend produces very different results even with the exact same input. So it does help to produce multiple images with the exact same input.
Aspect Ratio
The Hyperion Blend allows you to select an aspect ratio. Default is a square image, a 16:9 landscape format and 9:16 portrait format are also available. This settings is currently not available for the Cronos Blend which will always be square.
Resolution
You can select a low resolution - typical 256 x 256 pixel depending on the aspect ration, or a high resolution, 512 x 512 pixel. This reflect the native internal resolution of the AI model.
It is also possible to use a seocndary AI to upscale that 4 times. As this AI is an uscaler, it does not result in major changes of the image composition but only adds finer details to the output.
Iterations
The Hyperion Blend has the concept of iterations. Those are the number of steps performed to optimized the image against the input text prompt. The sweet spot seems to be between 200 and 500. Where smaller numbers will make it more abstract. There are diminishing returns after 500 though - the image will not get much better anymore in most cases.
Quality
The Cronos Blend allows you to select a quality level. As the Cronos Blend uses more compute resources than Hyperion, the free-tier setting for Cronos is “low quality”. That said - it can still produce amazing art in “low” setting. The sweet spot on credits per quality is the medium setting. Medium produces amazing images. The maxed out settings is still much better but also needs to run 30-60 minutes depending on resolution.